move a VM instance between projects on Google Cloud Platform
Currently there is no one-line command to move a Linux VM instance between Google Cloud Platform projects, but I’ve created an easy to follow step-by-step guide that you can use. (Note: This guide does not cover Windows.)
Quick summary of steps needed
- Detach the boot disk from the VM that you intend to move by deselecting “Delete boot disk on instance delete” and terminating the VM
- Create an image from the detached boot disk
- Upload the image to Google Cloud Storage and share it with the new project
- Create a custom image under the new project based on the image you uploaded to Google Cloud Storage
- Create a new VM instance under the new project based on the custom image
Detailed steps of moving a VM between projects
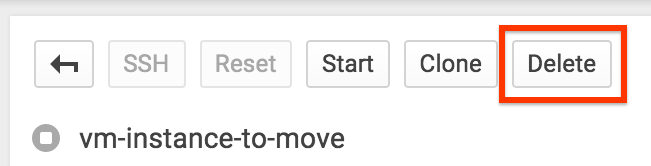
Deselect boot disk deletion (Important!) and terminate the VM that you want to move (I recommend shutting down gracefully before termination)


Create a temporary disk in the same zone as the disk from your terminated VM. Make it large enough to fit your VM image (use at least twice the size of the persistent disk of your VM – larger means faster)


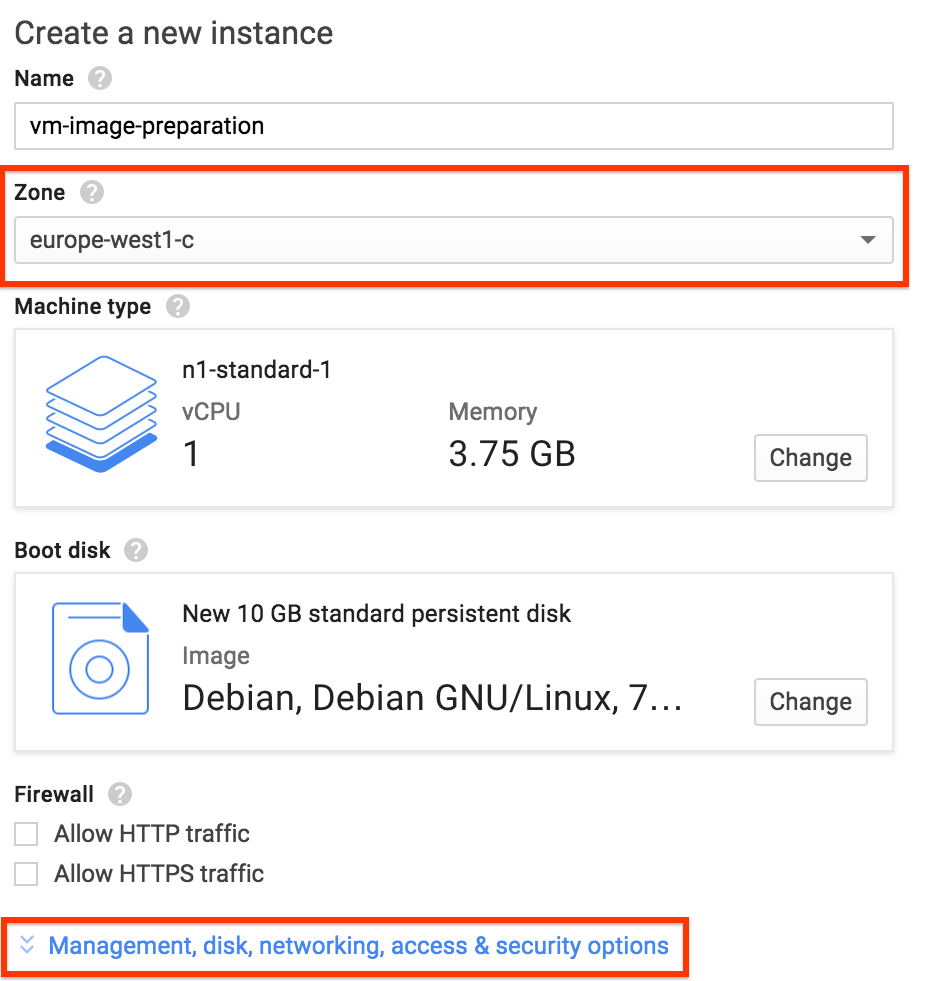
Create a VM instance with full access to Google Cloud Storage under the old project. Use the same zone the temporary and terminated VM disks are in. Don’t attach the temporary and terminated VM disks yet.


Attach the temporary disk and the disk from your terminated VM to the running VM we just created for the image preparation. This attaches the disks after boot and avoids boot complications.


SSH into the preparation VM, format and mount the temporary disk


$ /usr/share/google/safe_format_and_mount -m "mkfs.ext4 -F" /dev/sdb /mnt/temp
$ cd /mnt/temp
Use gcimagebundle to create a compressed image of the boot disk from your terminated VM. Once that is done upload it to a bucket in Google Cloud Storage with gsutil. Jump to the next step for instructions on how to create a bucket in Google Cloud Storage for the upload.
$ cd /mnt/temp
$ sudo gcimagebundle -d /dev/sdc -r /mnt/old-vm-disk -o /mnt/temp/ --log_file=/mnt/temp/image-create.log
> Created tar.gz file at /mnt/temp/62a70588477be42caf45c5c5c58a7e59a8aa410e.image.tar.gz
$ gsutil cp 62a70588477be42caf45c5c5c58a7e59a8aa410e.image.tar.gz gs://vm-transfer
> Uploading   ...588477be42caf45c5c5c58a7e59a8aa410e.image.tar.gz: 235.73 MiB/235.73 MiB
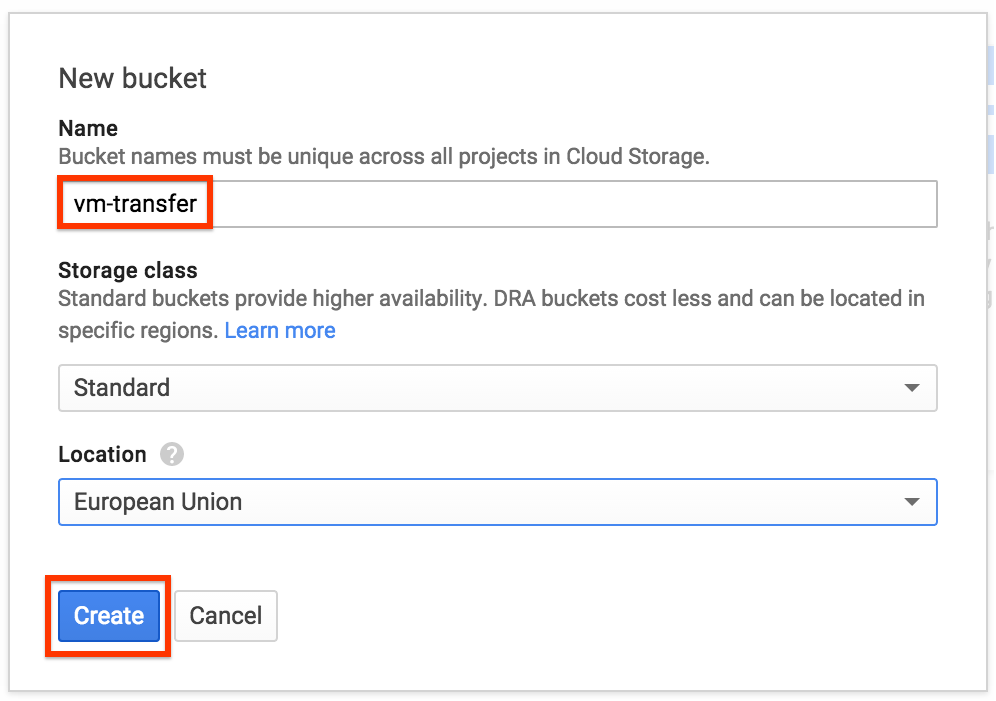
While gcimagebundle is running create a Google Cloud Storage bucket in your old project where the preparation VM is running

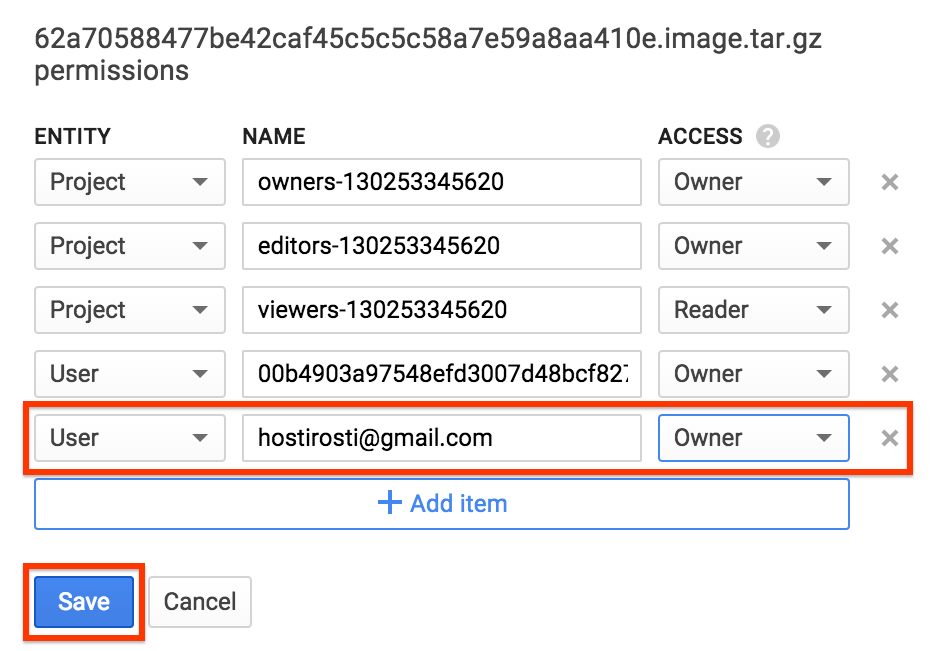
Make the Google Cloud Storage Object accessible to you in your new project by adding your email to the object permissions


Create a custom image from the Google Cloud Storage object in your new project


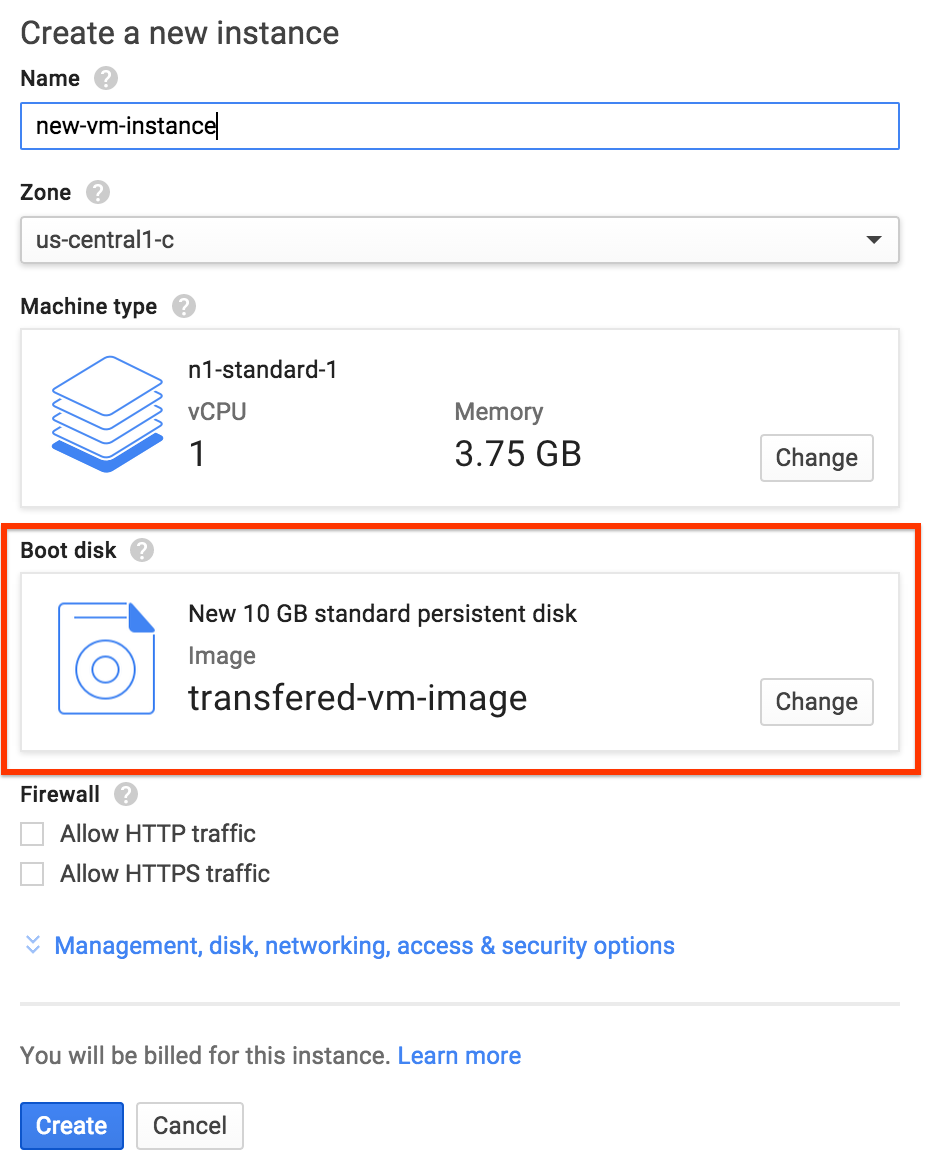
Create a VM instance from your custom image and voilà! ☺

Last but not least, cleanup all the resource you don’t need anymore. Once you’ve verified that the move of your VM was successful you can delete the temporary disk, the disk from the terminated VM, the preparation VM and the bucket in Google Cloud Storage from the old project.
![]()